


MongoDB (known as Mongo) is a Free Open-Source Document Oriented Database. It is classified as a NoSQL Database used for high-volume data storage. Unlike the table-based SQL Databases such as MySQL and PostgreSQL, MongoDB stores data in flexible JSON-like documents with a dynamic schema. As compared to Relational Databases, it doesn’t require any predefined schema before adding data to the Database. You can modify your table schema at any given point in time and any number of times without having to create a new database with the updated schema. As it is a distributed system, data recovery is instantaneous and more reliable.
Prerequisites
- Working knowledge of the command line/shell commands.
- Ubuntu should be installed as an Operating System on your workstation.
Steps to Install MongoDB on Ubuntu
To begin MongoDB’s installation process for Ubuntu, you can use the apt package manager. The apt command is a strong command-line mechanism that works in conjunction with Ubuntu’s Advanced Packaging Tool (APT). It executes functions such as installing new software packages, upgrading existing software packages, updating the package list index, and upgrading of entire Ubuntu system.
Follow the simple steps below to easily install MongoDB on Ubuntu:
Step 1: Importing the MongoDB Public GPG Key
To start your MongoDB installation, you need to first import the MongoDB repository key. Ubuntu checks that MongoDB packages are signed using the GPC Keys ensuring the package consistency and authenticity. You can now launch the terminal and run the following command to start the import and later add the public key:
wget -qO – https://www.mongodb.org/static/pgp/server-4.4.asc | sudo apt-key add –
This article shows the complete installation of the official MongoDB package version 4.4. If you want to go for another version, just replace 4.4 in the above command with your preferred version.


You will get OK in the Output if the key is added successfully. However, if an error indicating that gnupg is not installed shows up on your screen, execute the command given just below and then re-run the above command for importing the key.
sudo apt-get install gnupg
Step 2: Creating a List file for MongoDB
After you have added the key, you can now create a source.list file where the APT looks for online sources of packages to download and install.The source file will list down the sources that are active and contributing in the APT data. It follows a single source/line approach, but all the preferred or desired sources are always listed at the start. Run the following command to create the list file /etc/apt/sources.list.d/mongodb-org-4.4.list for your version of Ubuntu.
echo “deb [ arch=amd64,arm64 ] https://repo.mongodb.org/apt/ubuntu focal/mongodb-org/4.4 multiverse” | sudo tee /etc/apt/sources.list.d/mongodb-org-4.4.list
The above code is for Ubuntu 20.04 version, also known as focal. You can change the version name to bionic or xenial according to your OS version.
Now, run the given command to start updating your system’s repository index and then reload the local package Database:
sudo apt-get update
Step 3: Installing the MongoDB Packages
You now need to install the most recent & stable version of MongoDB by running the given command:
sudo apt-get install -y mongodb-org

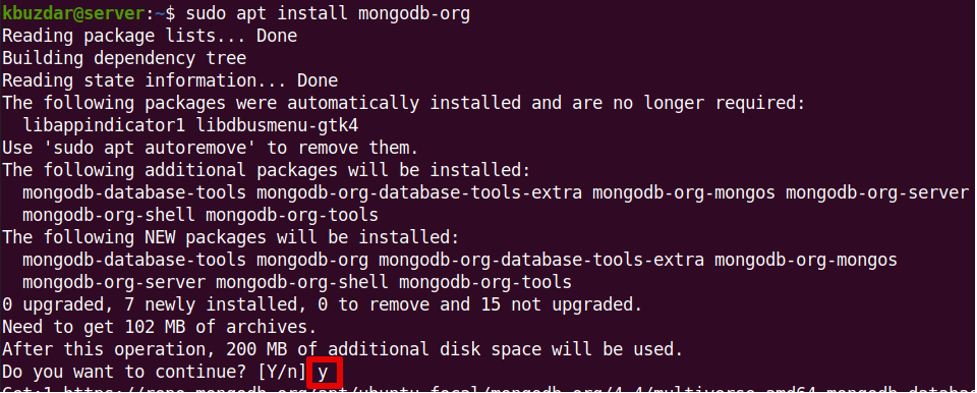
Here, you’ll have to enter in y once you get a prompt with a y/n choice to move ahead.
If you desire to install a particular version of MongoDB, you can run the following command and specify the particular component package individually along with the version number:
sudo apt-get install -y mongodb-org=4.4.10 mongodb-org-server=4.4.10 mongodb-org-shell=4.4.10 mongodb-org-mongos=4.4.10 mongodb-org-tools=4.4.10
Step 4: Run MongoDB
After you have installed MongoDB on Ubuntu, you can now run your mongod process using your Operating Sytem’s built-in init system i.e systemd for Linux via the systemctl command.
To start off the mongod process, you can now enter and execute the given command:
sudo systemctl start mongod
If you get a error message such as “Failed to start mongod.service: Unit mongod.service not found.”, run the following command given below and then execute the above command again.
sudo systemctl daemon-reload
After starting the mongod process, you can check if MongoDB is running fine by executing the following command:
sudo systemctl status mongod
If the process has started successfully, it will display the following output:


You can also set MongoDB to start automatically at each boot by issuing the following command:
sudo systemctl enable mongod
After this you can run the mongo shell on the same host workstation as the mongod by running the command given below:
$ mongo
You can also install and configure MongoDB on Ubuntu manually via a downloaded .tgz tarball. However, this manual method is not recommended. The ideal way is to leverage the apt-based package manager. This will ensure that all the necessary dependenices get installed properly. Further, it will create & give you a sample configuration file such as mongod.conf file. This will help you get started and carry out all necesarry future upgrades and make the maintenance seamless.
Step 5: Uninstall MongoDB on Ubuntu
You can remove MongoDB from Ubuntu with a few commands. However, you must remember that this task once executed is irreversible and the commands will completely remove MongoDB, its configuration, and all Databases.
Firstly, to stop the mongod process execute the following command:
sudo service mongod stop
Now to uninstall any MongoDB packages that you had previously installed, issue the following command:
sudo apt-get purge mongodb-org*
Finally, to remove all MongoDB Databases and log files, run the command given below:
sudo rm -r /var/log/mongodb
sudo rm -r /var/lib/mongodb
Conclusion
This article introduces you to MongoDB and provides a step-by-step guide to easily Configure and Install MongoDB on Ubuntu using the package manager.

